Flow View
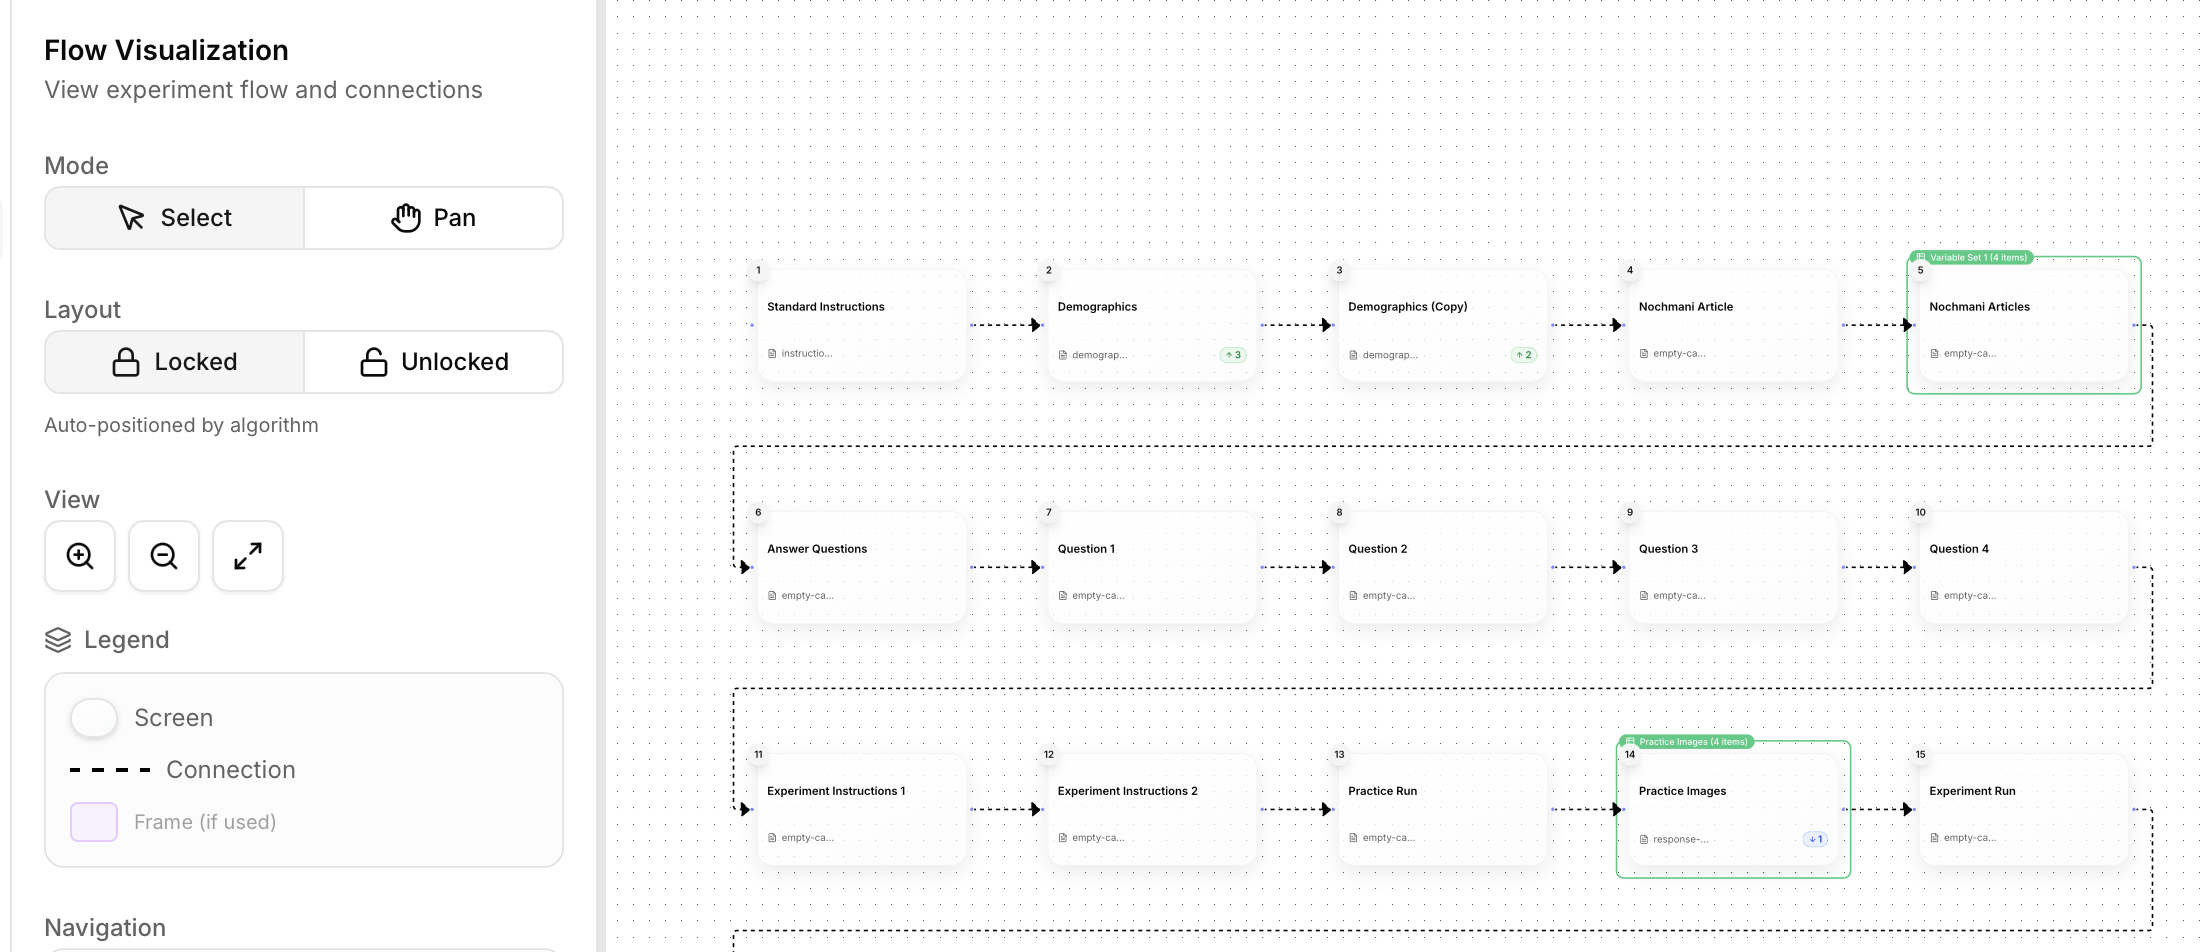
The Flow view provides a visual diagram of your experiment’s structure, showing how components connect and flow from one to another. Create loops, randomize trials, and set up conditional branching - all visualized in an intuitive flowchart.Overview
The Flow view helps you:- See the big picture - Visual representation of entire experiment
- Connect components - Draw connections between screens
- Create frames - Group components for loops and randomization
- Understand flow logic - See how participants move through your experiment
- Debug structure - Identify missing connections or flow issues
- Connecting components in sequence
- Creating loops for repeated trials
- Setting up randomization
- Visualizing experiment structure
- Planning conditional branching
Understanding Flow Diagrams
The flow diagram shows your experiment as a flowchart with:Nodes
Each node represents one component in your experiment:- Component name - Displayed on the node
- Component type - Icon indicating type (stimulus, response, instruction, etc.)
- Screen number - Sequential order number
- Status indicators - Warnings if component has issues
Connections
Arrows between nodes show how the experiment flows:- Sequential arrows - Solid line = automatic progression
- Conditional arrows - Dashed line = conditional branching
- Loop arrows - Curved line = return to earlier component
Frames
Boxes around groups of nodes represent frames:- Loop frames - Indicated with “Loop ×N” label
- Randomization frames - Indicated with shuffle icon
- Per-stimulus frames - Indicated with variable icon
- Conditional frames - Indicated with branch icon
Connecting Components
Create the flow of your experiment by connecting components together.Sequential Connections
The most common connection type: one component after another. How to create:- Click the output port (right side) of first component
- Drag to the input port (left side) of next component
- Release to create connection
- Arrow appears showing flow direction
Auto-Connect
When you add components in Timeline view, they automatically connect in sequence. The Flow view visualizes these connections.Removing Connections
To remove a connection:- Click the connection arrow
- Press
DeleteorBackspace - Or right-click and select “Delete Connection”
Rearranging Flow
The flow diagram auto-layouts for clarity, but you can:- Zoom in/out - Mouse wheel or zoom controls
- Pan - Click and drag empty space
- Fit to view - Button to see entire flow at once
- Auto-layout - Reorganize nodes automatically
Frames
Frames are powerful tools for controlling how components repeat, randomize, or branch. Think of frames as containers that apply special logic to the components inside them.Loop Frames
Repeat a sequence of components multiple times. What they’re for:- Practice trials (repeat 5 times)
- Experimental blocks (repeat 20 times)
- Multi-trial tasks (repeat 160 times)
- Any repeated sequence
- Select components to loop (click first, then Shift+click last)
- Right-click → “Create Loop Frame”
- Set repeat count (e.g., 20)
- Components now enclosed in loop frame box
- Repeat count - How many times to loop (1-1000)
- Loop name - Descriptive label (e.g., “Practice Block”)
- Iteration tracking - Track which iteration participant is on
Randomization Frames
Shuffle the order of components randomly. What they’re for:- Randomized trial order
- Counterbalancing conditions
- Unpredictable sequences
- Preventing order effects
- Select components to randomize
- Right-click → “Create Randomization Frame”
- Components will appear in random order each time
- Randomization seed - For reproducible randomization (optional)
- Constraints - Prevent certain orders (e.g., no more than 3 consecutive same type)
Per-Stimulus Frames
Link components to a set of stimuli for automatic trial generation. What they’re for:- Image-based tasks (show each image from a set)
- Word lists (present each word once)
- Stimulus-driven experiments
- Simple variable substitution
- Upload stimuli to media library
- Select component(s) to vary
- Right-click → “Create Per-Stimulus Frame”
- Select stimulus set from media library
- Map stimuli to component elements
- Stimulus source - Which media library folder
- Stimulus count - How many stimuli (auto-detected)
- Randomize - Shuffle stimulus order
- Sampling - Present subset of stimuli
Conditional Frames
Branch to different components based on participant responses. What they’re for:- Adaptive testing (adjust difficulty based on performance)
- Until-correct loops (repeat until participant answers correctly)
- Branching surveys (different questions based on previous answers)
- Personalized experiment paths
- Select components for conditional logic
- Right-click → “Create Conditional Frame”
- Choose condition type:
- Until correct - Repeat until correct response
- Max attempts - Limit number of tries
- Custom condition - Based on any variable
Until-Correct Loop
Repeat component until participant responds correctly. Properties:- Max attempts - Give up after N tries (prevents infinite loops)
- Feedback - Show why incorrect
- Fallback - What to do after max attempts reached
Max Attempts Loop
Repeat up to N times regardless of correctness. Use case: Limited practice trials Example:Custom Condition
Branch based on any variable value. Example:- Condition expression - Variable comparisons
- True path - Components if condition met
- False path - Components if condition not met
Frame Operations
Creating Frames
- Select components:
- Click first component
- Hold Shift and click last component (selects range)
- Or drag box around components
- Create frame:
- Right-click selection
- Choose frame type from menu
- Configure frame:
- Set properties in right panel
- Name frame descriptively
Adding Components to Frames
Add after creation:- Drag component into frame boundary
- Component becomes part of frame
- Frame resizes to fit
- Create frame first (empty)
- Add components inside frame boundary
- Components auto-add to frame
Removing Components from Frames
Option 1: Remove one component- Drag component outside frame boundary
- Component disconnects from frame
- Right-click frame → “Ungroup”
- Frame dissolves, components remain with connections
Deleting Frames
To delete frame but keep components:- Right-click frame → “Delete Frame”
- Components remain, frame logic removed
- Select frame
- Press Delete
- Confirm deletion
Nested Frames
Frames can contain other frames for complex structures. Example: Nested Loops + RandomizationViewing and Navigation
Zoom Controls
- Zoom in - Mouse wheel up or
+button - Zoom out - Mouse wheel down or
-button - Fit to view - Zoom to show all components
- Zoom to selection - Zoom to selected components
Pan and Navigate
- Pan - Click and drag on empty space
- Minimap - Small overview in corner shows position in large flows
- Jump to component - Search and auto-pan to specific component
Auto-Layout
Click “Auto-Layout” to reorganize flow diagram:- Horizontal layout - Left to right flow (default)
- Vertical layout - Top to bottom flow
- Hierarchical - Shows nested frames clearly
- Compact - Minimize space between nodes
Selecting Components
From the flow diagram:- Click component node
- Right panel shows component properties
- Edit properties without leaving Flow view
- Hold Shift and click multiple nodes
- Or drag box around multiple nodes
- Apply frame or alignment to all
Inter-Trial Fixation
Add fixation crosses or blank screens between trials automatically. What it’s for:- Eye fixation point before stimulus
- Mental reset between trials
- Timing marker
- Standard cognitive neuroscience practice
- Select frame (e.g., loop frame)
- Enable “Inter-trial fixation” in frame properties
- Configure fixation settings
- Enabled - Turn on/off
- Duration - How long fixation shows (typically 500-1000ms)
- Symbol - Choose:
+(cross),•(dot),×(X) - Color - Usually black or white depending on background
- Size - Font size of symbol
Common Flow Patterns
Linear Sequence
Simplest flow: components in order, no repeats. Use case: Simple survey, single-trial experiment Structure:- Add components in Timeline view
- Auto-connects in sequence
- Verify in Flow view
Randomized Trials
Shuffle trial order to prevent order effects. Use case: Multi-condition experiments, counterbalancing Structure:- Add all trial components
- Select trials to randomize
- Create randomization frame
Practice Trials Followed by Test Trials
Standard cognitive task structure. Structure:- Create practice sequence with feedback
- Add loop frame (5 reps)
- Add transition instruction
- Create test sequence without feedback
- Add loop frame (100 reps)
Conditional Branching Based on Performance
Adapt difficulty based on accuracy. Structure:- Create calibration trials
- Calculate accuracy
- Add conditional frame
- Define two paths (hard/easy)
- Connect to appropriate block
Multi-Block Experiment with Breaks
Long experiments need periodic breaks. Structure:- Create single trial sequence
- Add loop frame for trials per block (40)
- Add break component after loop
- Add block loop frame around entire structure (5 blocks)
Blocked vs. Randomized Design
Blocked design: All trials of one condition, then all of another- Blocked: When conditions require different instructions or setups
- Randomized: To prevent order effects and strategies
Tips and Best Practices
When to Use Frames vs. Timeline Variables
Use Loop Frames when:- Simple repetition of same sequence
- You don’t need per-trial parameter variation
- Less than ~10 trials
- Different stimuli/parameters each trial
- 20+ trials with systematic variation
- Need to import trial lists from CSV
- Complex trial structures
Organizing Complex Experiments
For experiments with many components:- Name frames clearly - “Practice Block”, “Main Task”, “Condition A Trials”
- Use Timeline folders - Group components visually in Timeline view
- Collapse frames - Hide frame contents in Flow view for overview
- Document flow - Add text notes explaining branching logic
- Modular design - Build and test each section separately
Testing Your Flow Logic
Before sharing experiment:- Trace paths - Mentally walk through each possible participant path
- Check for dead ends - Ensure all paths lead to experiment end
- Verify frame properties - Loop counts, randomization settings correct
- Test conditionals - Try all branches (high/low accuracy, different responses)
- Preview mode - Run through experiment as participant
- Missing connections (component doesn’t advance)
- Infinite loops (no exit condition)
- Unreachable components (no path leads to them)
- Wrong loop counts (10× instead of 100×)
Performance Considerations
For very large experiments (200+ components):- Use variables instead of components - 160 variable rows vs. 160 components
- Minimize frame nesting - Keep to 2-3 levels max
- Simplify flow - Reduce unnecessary branches
- Test performance - Preview with full trial count
Frame Naming Conventions
Use clear, descriptive names: Good names:- “Practice Trials (5 reps)”
- “Main Task Block 1”
- “Randomized Conditions A/B/C”
- “Until Correct (max 3 attempts)”
- “Loop 1”
- “Frame”
- “Randomize”
- “Test”
Flow View Limitations
What Flow view CAN’T do:- Edit component content (use Screens view)
- Configure timing (use Timeline view)
- Define trial variables (use Variables view)
- Run experiment (use Preview)
Next Steps
Now that you understand the Flow view, explore other views:Screens View
Design component content and layout
Timeline View
Control timing and trial organization
Variables View
Define trial-by-trial parameter variation
Preview
Test your experiment flow